1. La Grange octagonal Adolphe-Gagnon: located in Bas-Saint-Laurent, in Saint-Fabien. This barn which dates from 1888 is unique in its kind, it is distinguished by its octagonal architecture as its name suggests. Its planks are a beautiful pale gray to dark gray. This four-storey barn was converted into a museum in 2009.

You can take a guided tour here to immerse yourself in the life of a farmer in the 1900s. You can also participate in various activities throughout the year such as storytelling evenings, wine and cheese and family days.

2. The Priests Chaumont barn-stable: located in Sainte-Anne-des-Plaines and built in the 19th century, in the Lower Laurentians, this barn-stable is classified as a historic monument. Much smaller than the previous barn, it is no less surprising with its asymmetrical roof and gray planks. It happens to be the annex of the house of the Priests-Chaumont, also classified as a historical monument.

3. The Alexander-Solomon Walbridge barn: located in Montérégie, in Saint-Ignace-de-Stanbridge and built in 1882, it is also a one-of-a-kind barn with a ruff-shaped roof. Its 12-sided shape and its beautiful red barn planks make it in my eyes one of the most beautiful century-old barns in Quebec. This barn has 2 floors, the first which housed the cattle and a second which housed the hay which was thrown through a hole in the ground. The Alexander-Solomon barn holds the title of the oldest polygonal barn built in Quebec.

4. The Damase-Amédée-Dufresne circular barn: located in Estrie, in Austin, it was built according to a plan popular in the United States in 1907. It differs from its sisters by its circular shape, its construction entirely in gray and white wood, its three floors and its roof in the shape of a broken cone. It’s surprising to think of the fact that in those days buildings were constructed in circles to prevent the devil from hiding in corners. A nod to our ancient religious culture, now forgotten.

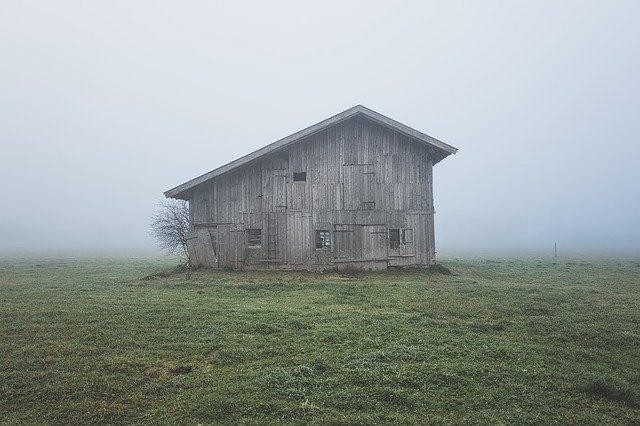
5. Lajoie barn: It is located in Charlevoix, in Saint-Urbain and was built in the second half of the 19th century. It has a thatched roof. An ancient construction technique used under the French Regime, but also after the conquest. It has sublime brown and gray planks and was built piece by piece. Its fairly standard gable roof looks more like other barns in Quebec than the other barns on this list.

Solū Floor takes off its hat to the municipalities that have opted to protect these historic monuments. It was completely restored, but not all barns in Quebec are so lucky. We also believe that while destroying these ancient buildings, it is best to recover them and offer people all over the world to be able to enjoy this beautiful board inside their homes.

A lot of people we talk to tell us: We would love to have a barn wood accent wall but we wonder if it’s complicated to install.

The answer is no, it is not really difficult to install. We have several clients, men and women who consider themselves non-manual who have managed to design wonderful projects.


Step # 1: Calculate the area to be covered

Installation of a barn wood wall_5

To know the number of boxes you will need to cover your wall, you must calculate and multiply the height of the surface of your wall as well as its width. You must then add 10% more to this area for the loss that will be caused when you are going to cut ends of the boards as when you are going to reach the end of a row. So if we take the example of a wall 144 inches wide (12 feet) and 102 inches high (8.5 feet). Here is the calculation:

Width: 12 feet

height: 8.5 feet

12 x 8.5 = 102 square feet

Loss: 102 x .10 = 10.2 feet

102 square feet + 10.2 square feet = 112.2 square feet


The boxes contain 14 square feet of wood so:

112.2 square feet / 14 square feet = 8,014 boxes


In this example you would need 8 boxes, but if you are having trouble figuring out the correct amount, please write to us on the live chat or email or Facebook 🙂

Here is a calculator to help you define the number of boxes so you need


Here is a calculator to help you define the number of boxes so you need


Step # 2: Prepare the surface that will receive the boards

Barn wall installation_3

Before you start, you will need to make some small preparations. Since barn wood planks are genuine and authentic and come from centuries-old buildings, some may have small holes no larger than the size of a pencil in diameter. So you have 2 choices, the first is to paint your wall a dark color so that the holes do not appear and the second is to buy what is called wood paste to fill the holes.

Then you must clean your wall with a damp cloth and then let it dry, this will allow the wall to have a smooth surface ready to receive the wooden planks.

You must also unscrew the plates located on the sockets and switches, you can put them back at the end of the project.


Step # 3: The Tools You Need

Barn wood wall installation_4

You are going to need:

1- A pneumatic nailer / stapler or hammer.

2- 3/4 to 1 ” nails

3- A knife with a retractable blade (exacto)

4- A spirit level of one meter

5- A lead pencil

6- A square

7- A tape measure

8- Miter saw or ordinary saw

9- Your barn wood boxes

Step # 4: Installing the planks

Barn wood wall installation

You can build your project from the bottom up or from the top down. Some people like to place the boards on the floor and mount their design before nailing the boards to the wall. Others will nail them directly to the wall.

The planks are 2-5 inches, so it is best to place the rows this way: 1 inch barn wood planks together, on another row put the 5 inch planks along with the 2 and 3 inch planks to keep the same width. 4 inch planks can be installed with 2 x 2 inch planks. (see the installation video).

The boards should be nailed by putting the nails at an angle on the boards, this will give them more stability than nailing straight. You must put approximately 10-15 nails per plank, go there to the eye so that it is stable.

When you get to a place where there is an electrical outlet, use your miter saw or regular saw to cut the board. (see the installation video).

CONCLUSION:

As we have shown you, building a barn wall is not that difficult. It takes a bit of preparation, a few tools, and following 4 easy steps.

Here are the 4 easy steps to build a beautiful barn wood wall:

  1. Calculate the area
  2. Prepare the surface that will receive the wood
  3. Get the right tools
  4. Install the boards

If you would like help or information to help you with your project, do not hesitate to contact us on the online chat or on our contact page 🙂

Watch the installation video